Manual Rev.: 1.3
Revision Date: September xx, 2023
Part Number: 50M-00040-1030
Preface
Copyright
Copyright © 2023 ADLINK Technology, Inc. This document contains proprietary information protected by copyright. All rights are reserved. No part of this manual may be reproduced by any mechanical, electronic, or other means in any form without prior written permission of the manufacturer.
Disclaimer
The information in this document is subject to change without prior notice in order to improve reliability, design, and function and does not represent a commitment on the part of the manufacturer. In no event will the manufacturer be liable for direct, indirect, special, incidental, or consequential damages arising out of the use or inability to use the product or documentation, even if advised of the possibility of such damages.
Trademarks
Product names mentioned herein are used for identification purposes only and may be trademarks and/or registered trademarks of their respective companies.
Revision History
| Revision | Description | Date |
|---|---|---|
| 1.0 | Initial release | 2020-10-07 |
| 1.1 | Release for EVA SDK R3.5 | 2021-07-30 |
| 1.2 | Release for EVA SDK R3.8
Support ROS Foxy Fitzroy. |
2022-07-26 |
| 1.3 | Release for EVA SDK R4.0
Support Euresys Gige Vision Camera and Euresys Open eVision |
2023-09-xx |
¶ 1 Introduction
This chapter describes the installation of the following software.
- GStreamer, Gstreamer RTSP Plugin and GStreamer Python Plugin
- NIVIDA® DeepStream, NIVIDA® CUDA and NIVIDA® TensorRT
- Intel® OpenVINO
- Intel® Media SDK for GStreamer
- Pylon Software
- Hikrobot Software
- FLIR Software
- ADLINK EVA SDK
- Euresys Solution Software
The following table lists the specified software versions.
| Item | Version |
|---|---|
| OS | Ubuntu 20.04 64-bit |
| GStreamer | 1.16.3 |
| NVIDIA® CUDA1 | 11.7.1 |
| NVIDIA® TensorRT™1 | 8.4.1.5 |
| NVIDIA® DeepStream1 | 6.1.1 |
| Intel® OpenVINO™2 | 2022.3 |
| Media SDK for GStreamer2 | 1.16.3 (in gst-plugins-bad) |
| OpenCV3 | 4.2.0 |
| Python | 3.8.2 |
| pylon | 7.2.1 |
| Hikrobot MVS | 2.1.2 |
| Flir Spinnaker SDK | 3.0.0.118 |
| Euresys Open eVision Libraries | 22.12.0.14750 |
| Euresys Open eVision cuda redist | 22.12.0.14750 |
| Euresys eGrabber & Memento | 23.02.0.68 |
Notes:
1 If the NVIDIA solution is used for inference, NVIDIA® DeepStream, NVIDIA® CUDA®, and NVIDIA® TensorRT™ must be installed.
2 If the Intel MSDK encoder and decoder are used for GStreamer plugins, Intel® OpenVINO™ and Intel® Media SDK must be installed.
The following table lists the estimated installation space required when installing the software under Ubuntu 18.04 64-bit. The required installation space includes the install file (.deb, .run, .tgz) package size.
| Software | Required Installation Space |
|---|---|
| GStreamer | 600MB |
| GStreamer Python Plugin | 200MB |
| NVIDIA Driver | 1GB |
| NVIDIA® CUDA | 11.5GB (deb file: 2.52GB) |
| NVIDIA® TensorRT™ | 6.3GB (deb file: 1.7GB) |
| librdkafka | 200MB |
| NVIDIA® DeepStream | 1.7GB (tbz2 file: 731MB) |
| Intel® OpenVINO™ | 250MB (tgz file: 50.6MB) |
| Media SDK for GStreamer | 200MB |
| Pylon | 1.6GB (gz file: 276MB) |
| Hikrobot MVS | 1.5GB (zip file: 540MB) |
| Flir Spinnaker SDK | 300MB (gz file: 53.7MB) |
| Euresys Open eVision Library | 2GB (gz file:524MB) |
| Euresys Open eVision cuda redist | 3GB (gz file: 622MB) |
| Euresys eGrabber | 2GB (gz file: 316MB) |
| Euresys Memento | 140MB (gz file: 17MB) |
For more details about ADLINK EVA, refer to https://eva-support.adlinktech.com.
¶ 2 Installing GStreamer on Ubuntu
The recommended installation configuration requires installing GStreamer 1.16.3 on Ubuntu 20.04.
¶ 2.1 Install GStreamer on Ubuntu
| $ sudo apt-get update
$ sudo apt-get install git libgstreamer1.0-0 gstreamer1.0-plugins-base gstreamer1.0-plugins-good gstreamer1.0-plugins-bad gstreamer1.0-plugins-ugly gstreamer1.0-libav gstreamer1.0-doc gstreamer1.0-tools gstreamer1.0-x gstreamer1.0-alsa gstreamer1.0-gl gstreamer1.0-gtk3 gstreamer1.0-qt5 gstreamer1.0-pulseaudio |
Reference: https://gstreamer.freedesktop.org/documentation/installing/on-linux.html?gi-language=c
¶ 2.2 Check the GStreamer Installation
| $ gst-launch-1.0 videotestsrc ! videoconvert ! autovideosink |
After executing the command, a window with an animated video pattern should display on-screen. Use CTRL+C in the terminal to stop the program.
¶ 2.3 Install RTSP Plugin for GStreamer (Optional)
If the data will be sent over an RTSP server, the system must have the RTSP plugin installed with the following command for GStreaming.
| $ sudo apt install gstreamer1.0-rtsp |
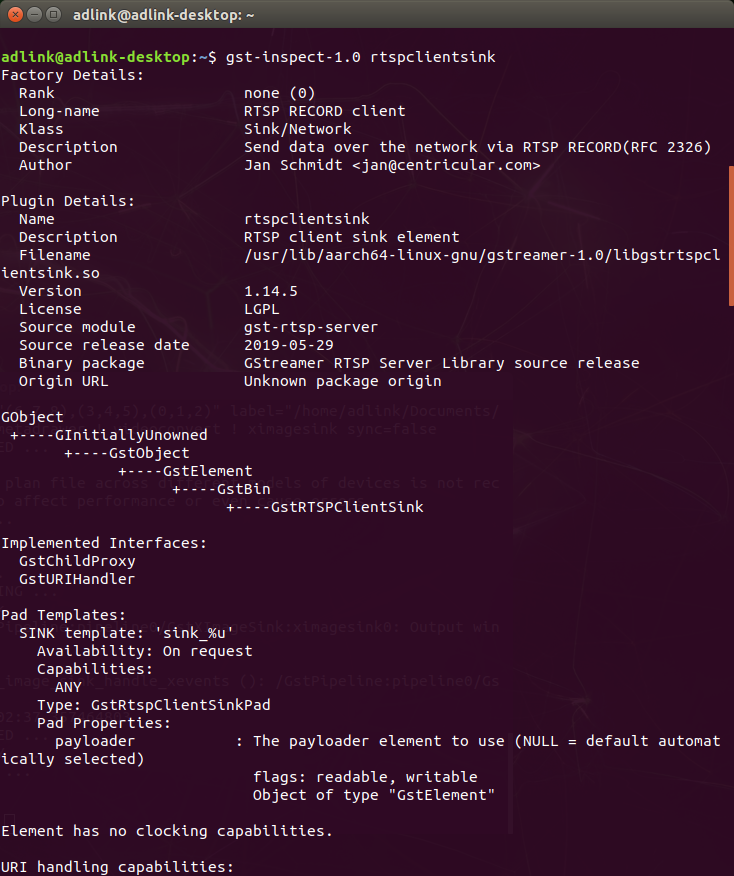
Use the following command to verify the installation.
| $ gst-inspect-1.0 rtspclientsink |
¶ 3 Installing the GStreamer Python Plugin
GStreamer is built on the GLib and GObject portable libraries which are compatible with Python. Gstreamer can be used in two ways: by writing GStreamer applications, or by writing GStreamer Python elements that can be scanned by the GStreamer Python plugin loader and registered as a plugin in GObject. The following sections describe how to install the GStreamer Python plugin.
¶ 3.1 Install the Required Packages
| $ sudo apt-get install python3-pip python-gi-dev python3-gst-1.0 |
If your platform is using Python 2.7, change the python3-gst-1.0 package to python-gst-1.0.
¶ 3.2 Install the GStreamer Python Plugin Loader
Currently, the Debian GStreamer Python package includes GObject Introspection files but does not include the GStreamer Python plugin loader, requiring the use of a GStreamer Python application.
Install python plugin loader package
| $ sudo apt-get install gstreamer1.0-python3-plugin-loader |
Install the required Python packages
| $ pip3 install numpy>=1.16.6 opencv-python==4.2.0.34 |
Notes:
If the CPU is an Intel® Atom™ series processor, installation of opencv-python will take about 1 to 1.5 hours. Do not interrupt the installation process.
Check for installed Python plugins
| $ gst-inspect-1.0 python |
If the Python plugins are found, the installation has been successful.
¶ 4 Installation Process for Intel Solution
The ADLINK EVA SDK also supports the Intel OpenVINO inference solution based on your specific system configuration requirements.
For ADLINK EVA SDK with the Intel solution, the following components must be installed on Ubuntu 18.04:
- OpenVINO 2022.3
- Intel Media SDK plugin for GStreamer (optional)
If you are not using the Intel® OpenVINO™, this chapter can be skipped.
¶ 4.1 Uninstall Non-specified Version
If the system has a non-specified version of OpenVINO, uninstall it.
OpenVINO 2021.3 or earlier version removal:
use the OpenVINO toolkit installation package to uninstall it.
| $ cd [OpenVINO toolkit installation package folder]
##Please move the path according to the actual directory location $ sudo ./install_GUI.sh |
Choose Uninstall the product and follow the instructions on the screen to uninstall.
OpenVINO 2021.4 or later version removal:
Refer to https://docs.openvino.ai/latest/openvino_docs_install_guides_uninstalling_openvino.html
Choose your version and follow the instructions to uninstall the OpenVINO.
¶ 4.2 Installing the OpenVINO Toolkit
EVA SDK only needs the OpenVINO runtime, the section will describe how to download and use archive files to install OpenVINO Runtime.
For more details, refer to https://docs.openvino.ai/2022.3/openvino_docs_install_guides_overview.html
1. Download and Install the OpenVINO Core Components
Open a terminal, and enter the following commands.
| $ sudo mkdir /opt/intel
$ sudo apt install curl $ cd ~/Downloads $ curl -L https://storage.openvinotoolkit.org/repositories/openvino/packages/2022.3/linux/l_openvino_toolkit_ubuntu20_2022.3.0.9052.9752fafe8eb_x86_64.tgz --output openvino_2022.3.0.tgz $ tar -xf openvino_2022.3.0.tgz $ sudo mv l_openvino_toolkit_ubuntu20_2022.3.0.9052.9752fafe8eb_x86_64 /opt/intel/openvino_2022.3.0 $ cd /opt/intel/openvino_2022.3.0/ $ sudo -E ./install_dependencies/install_openvino_dependencies.sh $ sudo ./install_dependencies/install_NEO_OCL_driver.sh |
Create link
| $ if [ -d /opt/intel/openvino ]; then sudo rm -rf /opt/intel/openvino; fi
$ sudo ln -s /opt/intel/openvino_2022.3.0 /opt/intel/openvino |
2. Configure the Environment
Set environment variables for OpenVino
| $ source /opt/intel/openvino/setupvars.sh |
Optional: The OpenVINO environment variables are removed when you close the shell. As an option, you can permanently set the environment variables as follows:
- Open the
.bashrcfile
- Add this line to the end of the file
source /opt/intel/openvino/setupvars.sh
- To test your change, open a new terminal. You should see
[setupvars.sh] OpenVINO environment initialized.
For more details of the installation, refer to https://docs.openvino.ai/2022.3/openvino_docs_install_guides_installing_openvino_from_archive_linux.html
¶ 4.3 Installing the Intel Media SDK Plugin for Gstreamer (Optional)
If you would like to use Media SDK plugin in GStreamer, install OpenVinoTM first. It will include Intel Media SDK and the related libraries such as VAAPI, LibVA, and gmmlib.
The Intel Media SDK plugin source code is in gst-plugins-bad module, but as of Aug. 23, 2019, the GStreamer package installed via apt-get does not contain the msdk plugin, so it must be built and installed.
For more details, refer to https://github.com/Intel-Media-SDK/MediaSDK/wiki/Build-GStreamer-MSDK..
1. Prepare the Environment and Dependencies
| $ sudo apt-get install libva-dev libmfx-dev intel-media-va-driver-non-free
$ export LIBVA_DRIVER_NAME=iHD |
2. Download and Build the Source Code
Download the source code
| $ git clone -b 1.16 https://gitlab.freedesktop.org/gstreamer/gst-plugins-bad.git |
Before building, install the following package
| $ sudo apt-get update
$ sudo apt-get install gtk-doc-tools libgstreamer1.0-dev libgstreamer-plugins-base1.0-dev libgudev-1.0-dev $ sudo apt-get install meson ninja-build |
Build and install the source code
| $ cd gst-plugins-bad
$ meson build $ ninja -C build $ sudo cp $PWD/build/sys/msdk/libgstmsdk.so /usr/lib/x86_64-linux-gnu/gstreamer-1.0 |
Note:
After configure log must contains:
Run-time dependency libmfx found: YES 1.32
Has header "mfx/mfxdefs.h": YES
Has header "mfxvp9.h": YES
Check for the msdk plugin
| $ gst-inspect-1.0 | grep msdk |
The following is an example of the installed package.
|
$ gst-inspect-1.0 | grep msdk msdkvpp: MSDK Video Postprocessor
|
¶ 5 Installation Process for NVIDIA Solution (Optional)
The ADLINK EVA SDK also supports the NVIDIA inference solution based on your specific system configuration requirements.
For ADLINK EVA SDK with the NVIDIA solution, the following components must be installed on Ubuntu 20.04:
- GStreamer 1.16.x
- NVIDIA Driver 515 or higher
- CUDA 11.7
- TensorRT 8.4.1.5
- DeepStream 6.1.1 (optional)
This chapter will describe the installation and uninstallation steps provided on the NVIDIA official website.
If you are not using an NVIDIA inference solution, this chapter can be skipped.
¶ 5.1 Uninstall Non-specified Version
This section describes how to unistall a non-specified version of the NVIDIA solution software. After the components have been removed, you must reboot the system.
¶ 5.1.1 Remove DeepStream
Check the DeepStream Version
| $ deepstream-app --version-all |
DeepStream 3.0 or earlier version removal:
| $ sudo rm -rf /usr/local/deepstream /usr/lib/x86_64-linux-gnu/gstreamer-1.0/libgstnv* /usr/bin/deepstream* /usr/lib/x86_64-linux-gnu/gstreamer-1.0/libnvdsgst* /opt/nvidia/deepstream/deepstream* /usr/lib/x86_64-linux-gnu/gstreamer-1.0/deepstream*
$ sudo rm -rf /usr/lib/x86_64-linux-gnu/libv41/plugins/libcuvidv4l2_plugin.so |
DeepStream 4.0 or later version removal:
- Open the uninstall.sh file in /opt/nvidia/deepstream/deepstream/
- Set PREV_DS_VER as the version number (e.g: 4.0)
- Run the following command script
$ sudo ./uninstall.sh
¶ 5.1.2 Remove TensorRT
Check the TensorRT version
| $ dpkg -l | grep nvinfer |
Remove TensorRT
| $ sudo apt-get --purge remove "*tensorrt*"
$ sudo apt-get --purge remove "libnvinfer*" $ sudo apt-get autoremove |
Reference: https://docs.nvidia.com/deeplearning/tensorrt/install-guide/index.html#uninstalling.
¶ 5.1.3 Remove CUDA
Check the CUDA version
| $ /usr/local/cuda/bin/nvcc --version |
Remove the CUDA Toolkit
| $ sudo apt-get --purge remove "*cublas*" "*cufft*" "*curand*" "*cusolver*" "*cusparse*" "*npp*" "*nvjpeg*" "cuda*" "nsight*"
$ sudo apt-get autoremove |
Notes:
- If using a runfile for installation, refer to https://docs.nvidia.com/cuda/cuda-installation-guide-linux/index.html#handle-uninstallation
- Reference: https://docs.nvidia.com/cuda/cuda-installation-guide-linux/index.html#removing-cuda-tk-and-driver
¶ 5.1.4 Remove NVIDIA Drivers
Check the driver
| $ nvidia-smi |
Remove NVIDIA Drivers
| $ sudo apt-get --purge remove "nvidia-driver*"
$ sudo apt-get autoremove $ sudo reboot |
¶ 5.2 Installing NVIDIA Drivers
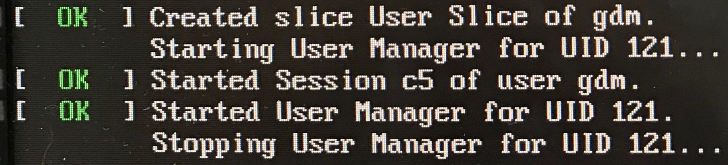
Before installing the NVIDIA graphics driver, use the “Software Updater” to install updated software first.
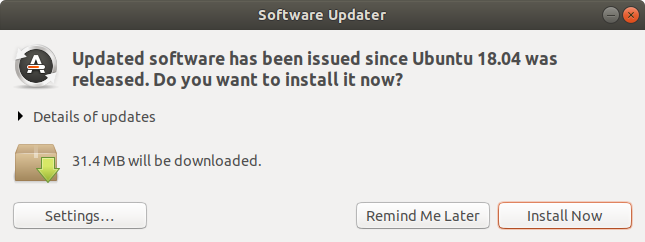
If the system software is not updated, after installing the NVIDIA driver and rebooting, the system can hang with the following message: “Stopping User Manager for UID 121”.
Insert the NVIDIA graphics card and follow the steps below to install the drivers.
1. Add the graphics-drivers repository to advanced package tool (apt)
| $ sudo add-apt-repository ppa:graphics-drivers/ppa
$ sudo apt update |
2. Check the NVIDIA Driver list
| $ ubuntu-drivers devices |
In this example, the system must have an NVIDIA device with a recommend driver version of 470 or later.
|
$ ubuntu-drivers devices == /sys/devices/pci0000:00/0000:00:1c.0/0000:02:00.0/0000:03:01.0 ==
|
3. Install the NVIDIA Driver
| $ sudo apt install nvidia-driver-515
$ sudo reboot |
4. Check the driver
| $ nvidia-smi |
In this example, the system installed driver version is 470 and supports CUDA driver version 11.4
|
$ nvidia-smi Thu Mar 16 17:19:14 2023 +-----------------------------------------------------------------------------+ | NVIDIA-SMI 515.86.01 Driver Version: 515.86.01 CUDA Version: 11.7 | |-------------------------------+----------------------+----------------------+ | GPU Name Persistence-M| Bus-Id Disp.A | Volatile Uncorr. ECC | | Fan Temp Perf Pwr:Usage/Cap| Memory-Usage | GPU-Util Compute M. | | | | MIG M. | |===============================+======================+======================| | 0 Quadro P2000 Off | 00000000:03:00.0 On | N/A | | N/A 49C P0 N/A / N/A | 262MiB / 4096MiB | 2% Default | | | | N/A | +-------------------------------+----------------------+----------------------+
+-----------------------------------------------------------------------------+ | Processes: | | GPU GI CI PID Type Process name GPU Memory | | ID ID Usage | |=============================================================================| | 0 N/A N/A 877 G /usr/lib/xorg/Xorg 89MiB | | 0 N/A N/A 1173 G /usr/bin/gnome-shell 87MiB |
|
¶ 5.3 Installing CUDA Toolkit
Download the CUDA Toolkit 11.7.1 original archive from https://developer.nvidia.com/cuda-11-7-1-download-archive?target_os=Linux&target_arch=x86_64&Distribution=Ubuntu&target_version=20.04&target_type=deb_local
The target platform must conform to the following requirements:
- Operation System: Linux
- Architecture: x86_64
- Distribution: Ubuntu
- Version: 20.04
- Installer Type: deb(local)
Run the following installation commands.
| $ wget https://developer.download.nvidia.com/compute/cuda/repos/ubuntu2004/x86_64/cuda-ubuntu2004.pin
$ sudo mv cuda-ubuntu2004.pin /etc/apt/preferences.d/cuda-repository-pin-600 $ wget https://developer.download.nvidia.com/compute/cuda/11.7.1/local_installers/cuda-repo-ubuntu2004-11-7-local_11.7.1-515.65.01-1_amd64.deb $ sudo dpkg -i cuda-repo-ubuntu2004-11-7-local_11.7.1-515.65.01-1_amd64.deb $ sudo cp /var/cuda-repo-ubuntu2004-11-7-local/cuda-*-keyring.gpg /usr/share/keyrings/ $ sudo apt-get update $ sudo apt-get -y install cuda $ sudo reboot |
¶ 5.4 Installing TensorRT
Download TensorRT 8.4.1.5 for Ubuntu 20.04 and CUDA 11.7 from https://developer.nvidia.com/compute/machine-learning/tensorrt/secure/8.4.1/local_repos/nv-tensorrt-repo-ubuntu2004-cuda11.6-trt8.4.1.5-ga-20220604_1-1_amd64.deb
Select Log in or Join now.
After downloading, install TensorRT from the debian local repository package with the following commands:
| $ sudo dpkg -i nv-tensorrt-repo-ubuntu2004-cuda11.6-trt8.4.1.5-ga-20220604_1-1_amd64.deb
$ sudo apt-key add /var/nv-tensorrt-repo-ubuntu2004-cuda11.6-trt8.4.1.5-ga-20220604/9a60d8bf.pub $ sudo apt-get update $ sudo apt-get install tensorrt |
Refer to the Debian installation online document for more information at https://docs.nvidia.com/deeplearning/tensorrt/archives/tensorrt-841/install-guide/index.html#installing-debian
¶ 5.5 Installing DeepStream (Optional)
If you are not using a DeepStream SDK, this section can be skipped.
The NVIDIA DeepStream SDK first requires installation of the following components:
- GStreamer
- NVIDIA Driver
- CUDA
- TensorRT
For more details, refer to https://docs.nvidia.com/metropolis/deepstream/6.1/dev-guide/text/DS_Quickstart.html#dgpu-setup-for-ubuntu
1. Install packages
Enter the following command to install the necessary packages before installing the DeepStream SDK:
| $ sudo apt install libssl1.1 libgstreamer1.0-0 gstreamer1.0-tools gstreamer1.0-plugins-good gstreamer1.0-plugins-bad gstreamer1.0-plugins-ugly gstreamer1.0-libav libgstrtspserver-1.0-0 libjansson4 libyaml-cpp-dev gcc make git python3 |
2. Install librdkafka
librdkafka enables the Kafka protocol adaptor for message brokering.
Clone the librdkafka repository from GitHub
| $ git clone https://github.com/edenhill/librdkafka.git |
Configure and build the library
| $ cd librdkafka
$ git reset --hard 7101c2310341ab3f4675fc565f64f0967e135a6a $ sudo ln -s /usr/bin/python3 /usr/bin/python $ ./configure $ make $ sudo make install |
Copy the generated libraries to the DeepStream directory
| $ sudo mkdir -p /opt/nvidia/deepstream/deepstream-6.1/lib
$ sudo cp /usr/local/lib/librdkafka* /opt/nvidia/deepstream/deepstream-6.1/lib |
3. Install the DeepStream SDK
Download the DeepStream 6.1 dGPU tar package from https://developer.nvidia.com/deepstream_sdk_v6.1.0_x86_64.tbz2.
Navigate to the location of the downloaded DeepStream package to extract and install the DeepStream SDK.
| $ sudo tar -xvf deepstream_sdk_v6.1.0_x86_64.tbz2 -C /
$ cd /opt/nvidia/deepstream/deepstream-6.1/ $ sudo ./install.sh $ sudo ldconfig |
Note:
NVIDIA provides three methods for installing the DeepStream SDK. The tar package MUST be used for installation. Attempting to use the Debian package or apt-server to install, will result in compatibility issues.
¶ 5.5.1 Verify DeepStream
After installing DeepStream, follow these steps to verify the installation.
1. Check version information
| $ deepstream-app --version-all |
2. Check the plugin in GStreamer
| $ gst-inspect-1.0 | grep nvvideo |
3. Verify the plugin via gst-launch
| gst-launch-1.0 videotestsrc num-buffers=1000 ! videoconvert ! "video/x-raw,format=(string)I420" ! nvvideoconvert ! nvv4l2h264enc ! h264parse ! matroskamux ! filesink location=videotestsrc.mkv |
The following is an example of a properly installed package.
|
$ gst-inspect-1.0 | grep nvvideo …
$ deepstream-app --version-all DeepStreamSDK 6.1.0
$ gst-launch-1.0 videotestsrc num-buffers=1000 ! videoconvert ! "video/x-raw,format=(string)I420" ! nvvideoconvert ! nvv4l2h264enc ! h264parse ! matroskamux ! filesink location=videotestsrc.mkv Setting pipeline to PAUSED ...
|
Note:
When running a GStreamer command or EVA IDE, the following warning messaging will display.
The first message is a harmless warning indicating that the DeepStream’s nvinferserver plugin cannot be used since “Triton Inference Server” is not installed on x86(dGPU) platforms.

Refer to NVIDIA troubleshooting for other solutions. https://docs.nvidia.com/metropolis/deepstream/dev-guide/text/DS_troubleshooting.html#errors-occur-when-deepstream-app-fails-to-load-plugin-gst-nvinferserver-on-dgpu-only
The second message is also a harmless warning because the NVIDIA Rivermax SDK is not necessary.
¶ 5.6 Installing ONNX Runtime
After installing the CUDA Toolkit, run the following command to install the ONNX Runtime packages.
| $ pip3 install pillow==9.4.0
$ pip3 install onnxruntime-gpu==1.12.1 |
Reference: https://www.onnxruntime.ai/
¶ 6 Installing Pylon Software (Optional)
If you are not using a Basler camera, you can skip this chapter.
¶ 6.1 Uninstall Non-specified Version
If the system has a non-specified version of the Pylon software, uninstall it.
If the installer is installed via deb, refer to the following command to remove pylon.
| $ sudo apt-get remove pylon |
¶ 6.2 Install pylon Software
If Basler cameras are used, the Pylon Software must be installed.
Download the pylon camera software from the Basler website at: https://www.baslerweb.com/en/sales-support/downloads/software-downloads/
The recommended software versions are:
- Software Category: pylon Software
- Version: 7.2.1
- Operating System: Linux x86-64 bit
Download the Debian Installer Package and use the following install command.
| $ tar xvfz pylon_7.2.1.25747_x86_64_debs.tar.gz
$ sudo dpkg -i pylon_7.2.1.25747-deb0_amd64.deb |
After the installation is completed, set the pylon library path environment variable with LD_LIBRARY_PATH.
For example, if the pylon library path is /opt/pylon/lib, execute the following command:
| $ export LD_LIBRARY_PATH=/opt/pylon/lib:$LD_LIBRARY_PATH |
Note:
You may need to set the environment for the system permanently.
- Open the .bashrc file in your home directory, for example:
$ gedit ~/.bashrc - Add export environment variables to the last line of the file, for example:
- export LD_LIBRARY_PATH=/opt/pylon/lib:$LD_LIBRARY_PATH
- Save the .bashrc file.
- Restart your terminal.
Verify the Basler's USB3/GigE Vision cameras with pylon
- After installing pylon, run the pylonviewer tool to test the camera.
- The file should be at /opt/pylon/bin.
- Refer to the following Basler document on using the pylonviewer: https://docs.baslerweb.com/overview-of-the-pylon-viewer.html
¶ 7 Installing Hikrobot Software (Optional)
If you are not using a Hikrobot camera, you can skip this chapter.
¶ 7.1 Uninstall Non-specified Version
If the system has a non-specified version of the Pylon software, uninstall it.
If the installer is installed via deb, refer to the following command to remove pylon.
| $ sudo apt-get remove mvs |
¶ 7.2 Install Hikrobot Software
If Hikrobot cameras are used, the Hikrobot MVS Software must be installed.
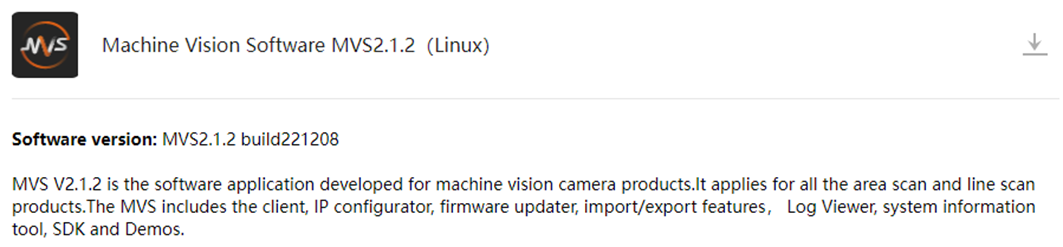
Download Machine Vision Software MVS2.1.2(Linux) from: https://www.hikrobotics.com/en/machinevision/service/download?module=0
Run the following commands to install.
| $ unzip -d MVS_STD MVS_STD_GML_V2.1.2_221208.zip -x *aarch64* *arm* *i386*
$ cd MVS_STD $ sudo dpkg -i MVS-2.1.2_x86_64_20221208.deb |
Note:
The above installation steps are for reference only. For more specific installation instructions, refer to the official documentation, or contact Hikrobot at https://en.hikrobotics.com/contactus.
¶ 8 Installing FLIR Software (Optional)
This chapter covers the installation of required software for use with FLIR cameras.
If you are not using a FLIR camera, this chapter can be skipped.
¶ 8.1 Uninstall Non-specified Version
If the system has a non-specified version of the FLIR Spinnaker software, uninstall it.
Run the uninstall script with the Spinnaker installation package.
| $ cd spinnaker-<version>
$ sudo ./remove_spinnaker.sh |
¶ 8.2 Install FLIR Spinnaker Software
If FLIR cameras are used, the FLIR Spinnaker Software Suite for Windows must be installed.
Download the FLIR Spinnaker installer from: https://www.flir.asia/products/spinnaker-sdk/
The recommended software versions are:
- Version: 3.0.0.118
- Operating System: Linux 20.04, 64-bit
Run the following commands and then follow the on-screen instructions to complete the installation.
| $ tar xvfz spinnaker-3.0.0.118*amd64-pkg.tar.gz
$ cd spinnaker-3.0.0.118-amd64 $ sudo ./install_spinnaker.sh $ sudo reboot |
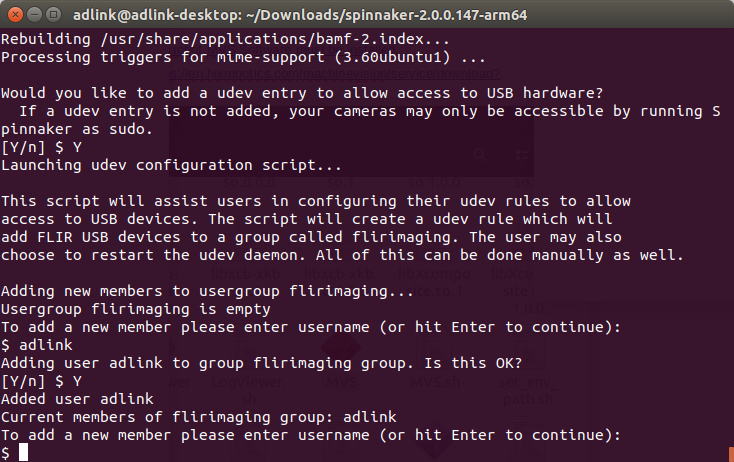
Note:
During installation, you MUST enter a “username” to add a new member.
For example, enter ‘adlink’ for the user name.
After installation, connect the camera and run the following command to verify that it works.
| $ spinview |
Note:
For more information, refer to https://www.flir.com/support-center/iis/machine-vision/application-note/using-spinnaker-on-arm-and-embedded-systems/
If you have any questions, go to https://www.flir.com/.
¶ 9 Installing Process for Euresys Solution (Optional)
This chapter covers the installation of the required software for using Euresys Open eVision and GigE Vision Cameras.
If you are not using Euresys solution, this chapter can be skipped.
If you would like to use Euresys, contact your regional distributor to get the Euresys licenses. https://www.euresys.com/en/Products/Accessory/Neo-USB-Dongle-(empty)
¶ 9.1 Installing GigE Vision Camera Software
If Gige vision cameras are used, the Memento and eGrabber software must be installed.
The recommended software versions are:
- Version: 23.02.0.68
- Operating System: Linux 20.04, 64-bit
Download Memento and eGrabber from https://www.euresys.com/en/Support/Software,-drivers-and-documentation?series=105d06c5-6ad9-42ff-b7ce-622585ce607f&os=Linux&packages=20d16334-0c64-45e0-8ba0-0d099597937f:23.02;e55e4c47-ed00-45cf-bc7e-ebd6fb2e4c23:23.02
Run the following commands to install.
| $ tar xvfz memento-linux-x86_64-23.02.0.68.tar.gz
$ cd memento-linux-x86_64-23.02.0.68 $ sudo ./install.sh $ cd .. $ tar xvfz egrabber-linux-x86_64-23.02.0.68.tar.gz $ cd egrabber-linux-x86_64-23.02.0.68 $ sudo ./install.sh $ source /opt/euresys/egrabber/shell/setup_gentl_paths.sh $ source /opt/euresys/egrabber/shell/select-gigelink-producer.sh |
For more details, refer to memento-linux-x86_64-22.10.1.45/INSTALL and egrabber-linux-x86_64-22.10.1.45/INSTALL.
Before using the Euresys eGrabber driver, you must set the following environment variables.
| $ source /opt/euresys/egrabber/shell/setup_gentl_paths.sh
$ source /opt/euresys/egrabber/shell/select-gigelink-producer.sh |
Optional: The environment variables are removed when you close the terminal. As an option, you can permanently set the environment variables as follows:
- Open the
.bashrcfile$ gedit ~/.bashrc - Add this line to the end of the file
source /opt/euresys/egrabber/shell/setup_gentl_paths.sh
source /opt/euresys/egrabber/shell/select-gigelink-producer.sh
After installation, connect the camera and run the following command to verify that it works.
| $ studio |
¶ 9.2 Installing Euresys Open eVision
If Euresys Open eVision are used, the Open eVision, the Neo License Manager, Codemeter, and the Open eVision Cuda resdist must be installed.
The recommended software versions are:
- Version: 22.12.0.14750
- Operating System: Linux 20.04, 64 bit
Download open_evision-linux-x86_64-22.12.0.14750.deb.tar.gz and open_evision-cuda-redist-linux-x86_64-22.12.0.14750.deb.tar.gz from https://www.euresys.com/en/Support/Download-area?Series=f97da39d-3c25-404c-aee7-73de1d1867fc
Run the following commands and then follow the on-screen instructions to complete the installation.
| $ tar xvfz open_evision-linux-x86_64-22.12.0.14750.deb.tar.gz
$ sudo apt install ./neo-linux-license-manager-x86_64-22.12.0.14750.deb ./open_evision-linux-x86_64-22.12.0.14750.deb ./codemeter -lite_7.40.4990.500_amd64.deb $ tar xvfz open_evision-cuda-redist-linux-x86_64-22.12.0.14750.deb.tar.gz $ sudo apt install ./open_evision-cuda-redist-linux-x86_64-22.12.0.14750.deb |
¶ 10 Installing the ADLINK EVA SDK
¶ 10.1 Remove Previous ADLINK EVA SDK Versions
If you have a previously installed version of the ADLINK EVA SDK, remove it with the following command:
| $ sudo /opt/adlink/eva/uninstall.sh |
If the install path has been changed, specified the correct path with:
| $ sudo [INSTALL_DIR]/uninstall.sh |
INSTALL_DIR enters the specified path.
Note:
When uninstalling the ADLINK EVA SDK, the folder specified with INSTALL_DIR will be deleted.
¶ 10.2 Install the Required Package for EVA IDE
| $ sudo apt-get install libopencv-core4.2 libopencv-imgproc4.2 libopencv-imgcodecs4.2 graphviz xclip
$ pip3 install pika==1.3.1 onnx==1.10.0 boto3 |
¶ 10.3 Download and Install the ADLINK EVA SDK
Download the ADLINK EVA SDK installation package and copy it to your Linux Ubuntu 18.04 64-bit system.
Change mode and run install package
| $ chmod +x EVA_SERP_xxxx.run
$ sudo ./EVA_SERP_xxxx.run |
xxxx is the version and the install path is /opt/adlink/eva.
Select the EVA SDK plugins to be installed.
|
Select GStreamer plugin to install. (Separate with comma, for example, “2,3,4”).
|
For example, to install the TensorRT inference plugin and the Pylon plugin, enter 3,4. To install all plugins, including the OpenVINO inference plugin, TensorRT inference plugin, Pylon plugin, Hik plugin, and Flir plugin, enter 1.
Notes:
- OpenVINO is only supported on Intel platforms.
- TensorRT is only supported on NVIDIA platforms.
- Before installing the EVA SDK, you must ensure the corresponding software packages have been installed. If the plugins are installed but there are no corresponding libraries, when the GStreamer command runs for the first time, it will display messages to warn that the related libraries are missing, and the installed plugins will not work.
Other commands can be used to install the ADLINK EVA SDK.
- Use the -s command option to install all the plugins in silent mode. The install path is /opt/adlink/eva.
$ sudo ./EVA_SERP_xxxx.run -- -s$ sudo ./EVA_SERP_xxxx.run -- -s
¶ 10.4 Set Environment Variables
Set environment variables for the ADLINK EVA SDK
| $ source /opt/adlink/eva/scripts/setup_eva_envs.sh |
The script will set up the environment variables of the following installed software.
- OpenVINO
- MediaSDK
- Pylon
- ADLINK EVA SDK
If the software has no corresponding libraries, the script will not set up the corresponding environment variables.
Note:
The environment variables are removed when closing the command prompt or terminal.
¶ Safety Instructions
Read and follow all instructions marked on the product and in the documentation before you operate your system. Retain all safety and operating instructions for future use.
- Please read these safety instructions carefully.
- Please keep this User‘s Manual for later reference.
- Read the specifications section of this manual for detailed information on the operating environment of this equipment.
- When installing/mounting or uninstalling/removing equipment, turn off the power and unplug any power cords/cables.
- To avoid electrical shock and/or damage to equipment:
- Keep equipment away from water or liquid sources.
- Keep equipment away from high heat or high humidity.
- Keep equipment properly ventilated (do not block or cover ventilation openings).
- Make sure to use recommended voltage and power source settings.
- Always install and operate equipment near an easily accessible electrical socket-outlet.
- Secure the power cord (do not place any object on/over the power cord).
- Only install/attach and operate equipment on stable surfaces and/or recommended mountings.
- If the equipment will not be used for long periods of time, turn off and unplug the equipment from its power source.
- Never attempt to fix the equipment. Equipment should only be serviced by qualified personnel.
Please visit the Contact page at www.adlinktech.com for information on how to contact the ADLINK regional office nearest you.